Manage time logs
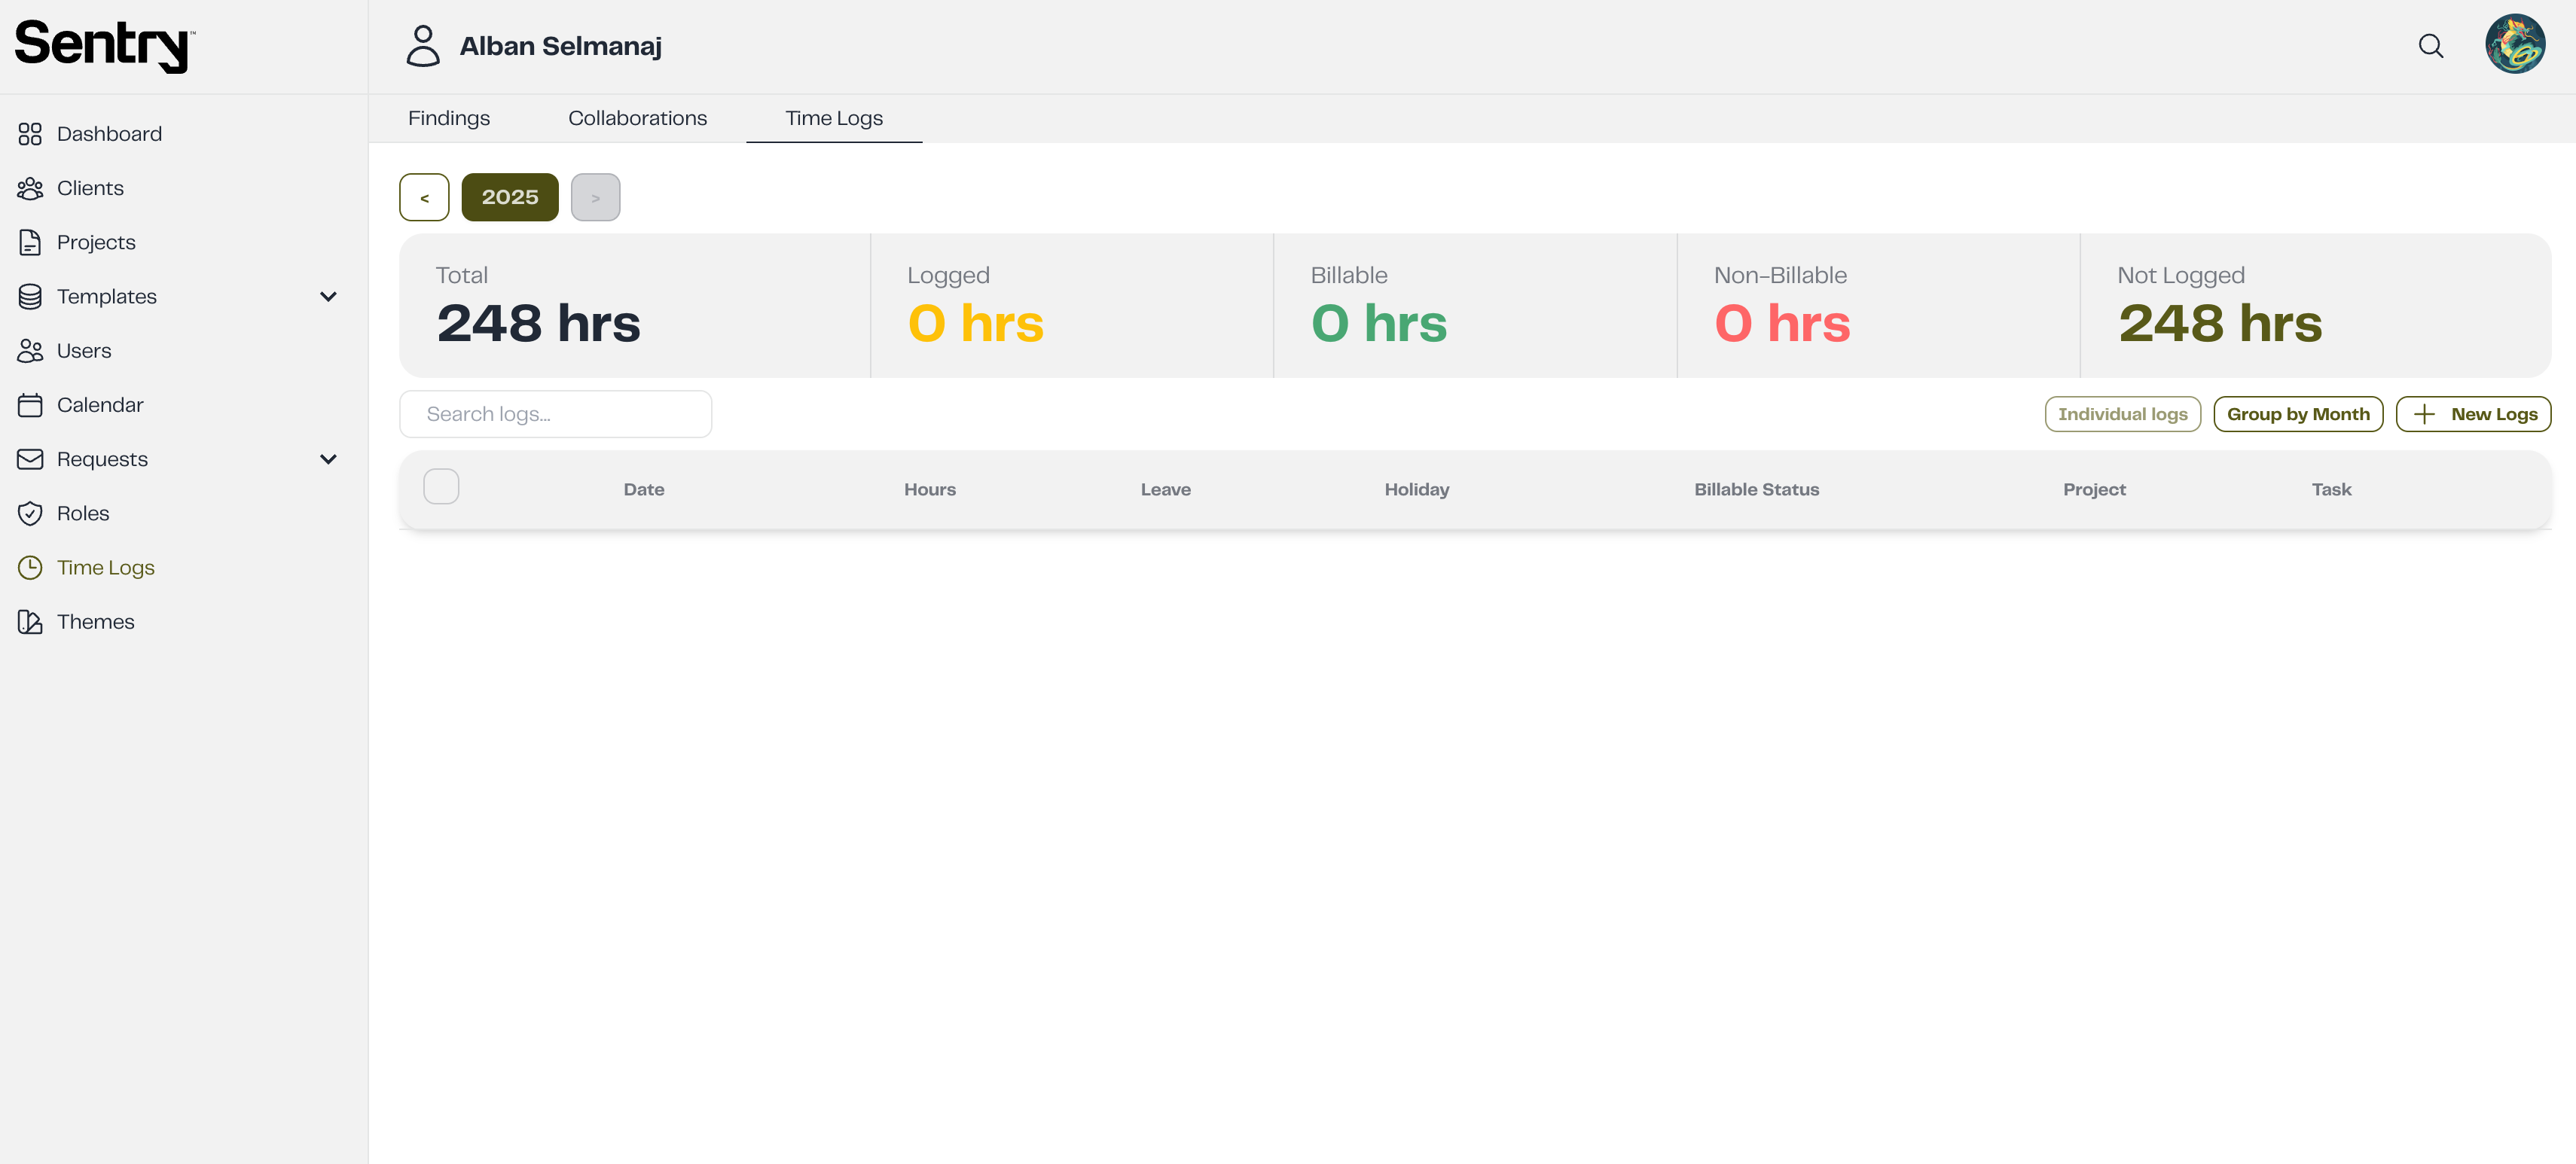
When you enter the Time Logs section, you can view the Time Logs Table, which displays all logged entries. Additionally, you can see the total number of hours, including logged hours, billable, non-billable, and not logged hours. Users can also filter logs by year and choose to view logs individually or group them by month for better organization.
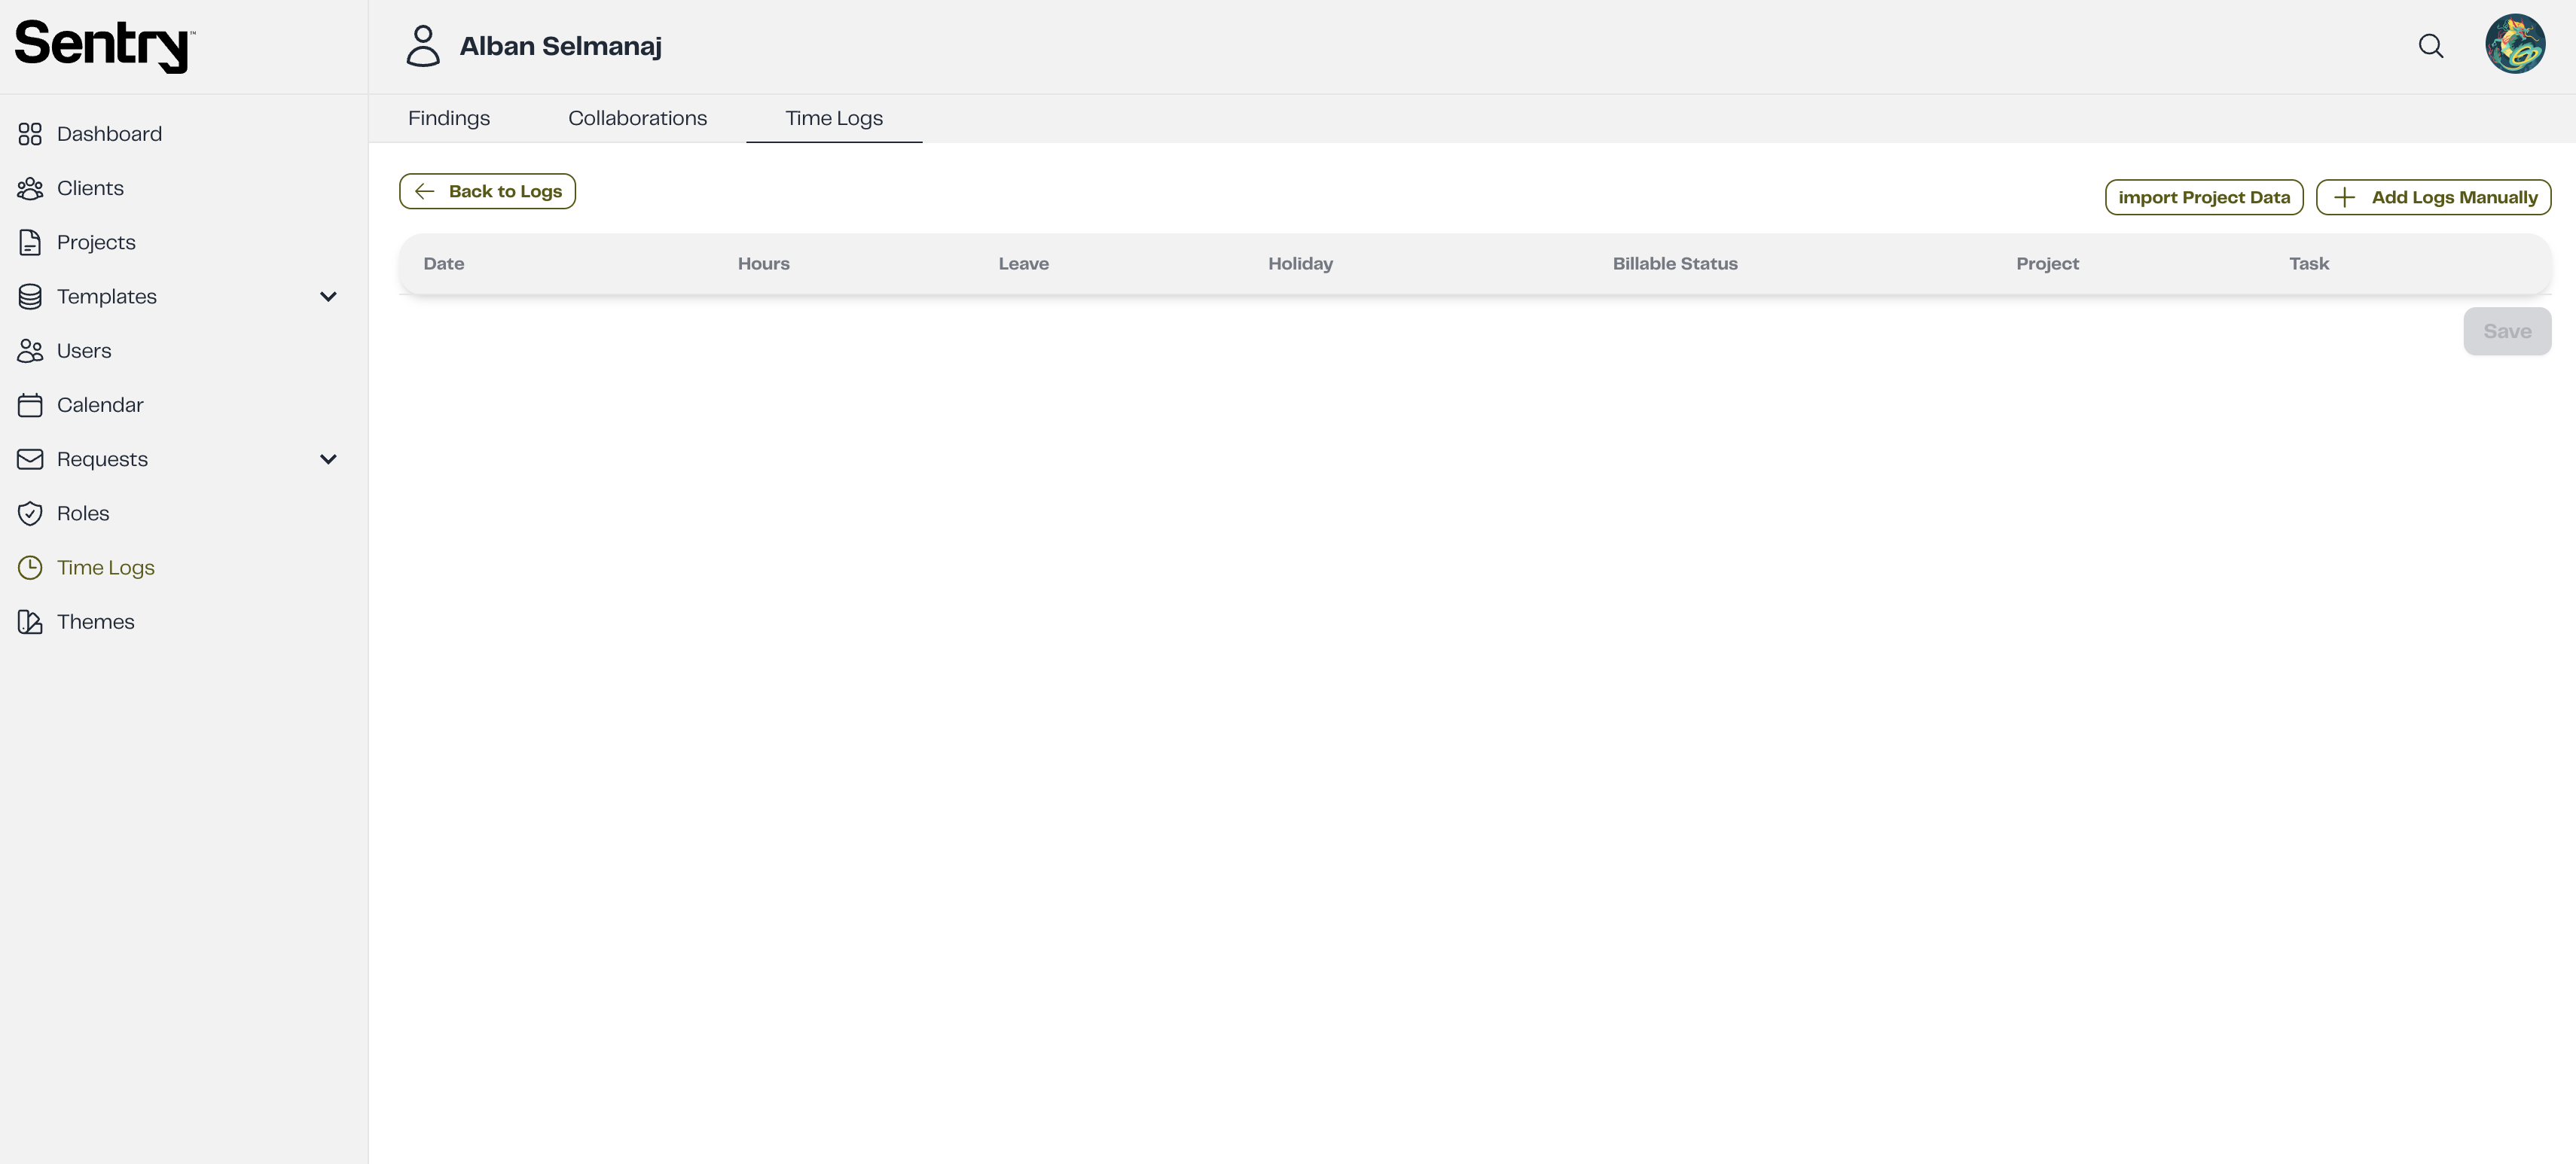
Adding Time Logs
To add a new time log:
- Click the New Logs button.
- A menu will appear with options to Import Project Data or Add Logs Manually.
Adding Logs Manually
- Click Add Logs Manually.
- A calendar modal will be displayed where you can select the dates you want to add hours for.
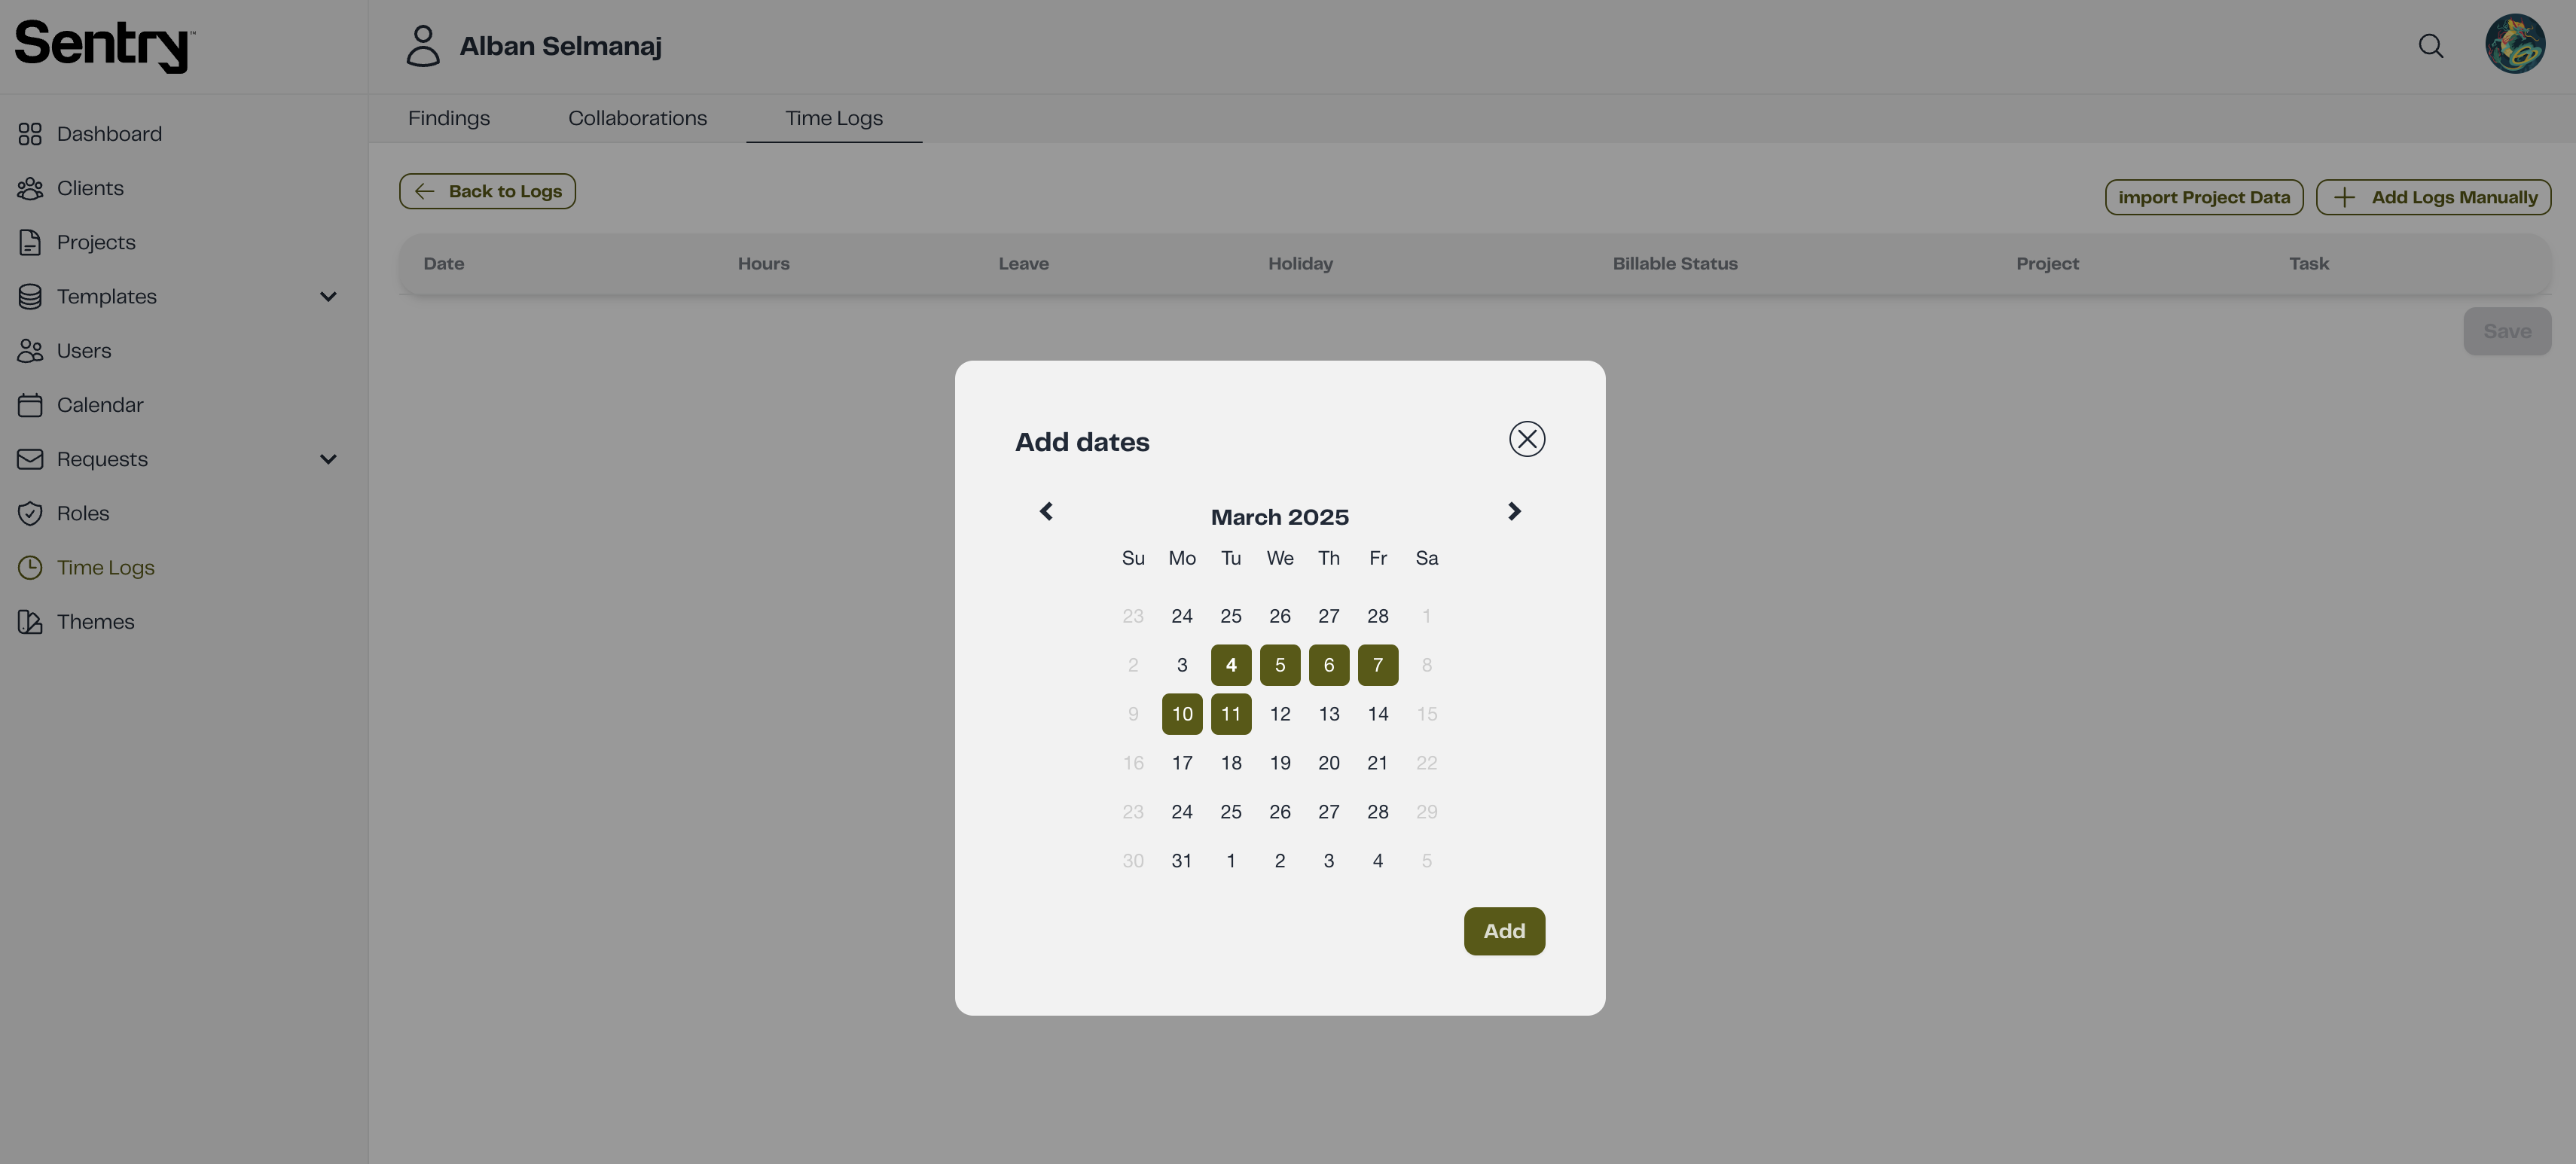
- Click Add, and the selected dates will be listed in the table.
- For each listed date, provide the following details:
- Working Hours: Specify the number of hours worked.
- Leave Type: Select a leave type if you were not working on that day.
- Holiday: Check the box if the selected day was a holiday.
- Billable Status: Choose whether the hours are Billable or Non-Billable.
- Project and Task: Assign the time log to a specific project and task.

- Click Save to add the logs or the X button to cancel.
Using the Import Project Data Option
- Click Import Project Data.
- A modal will appear displaying the projects you have worked on.
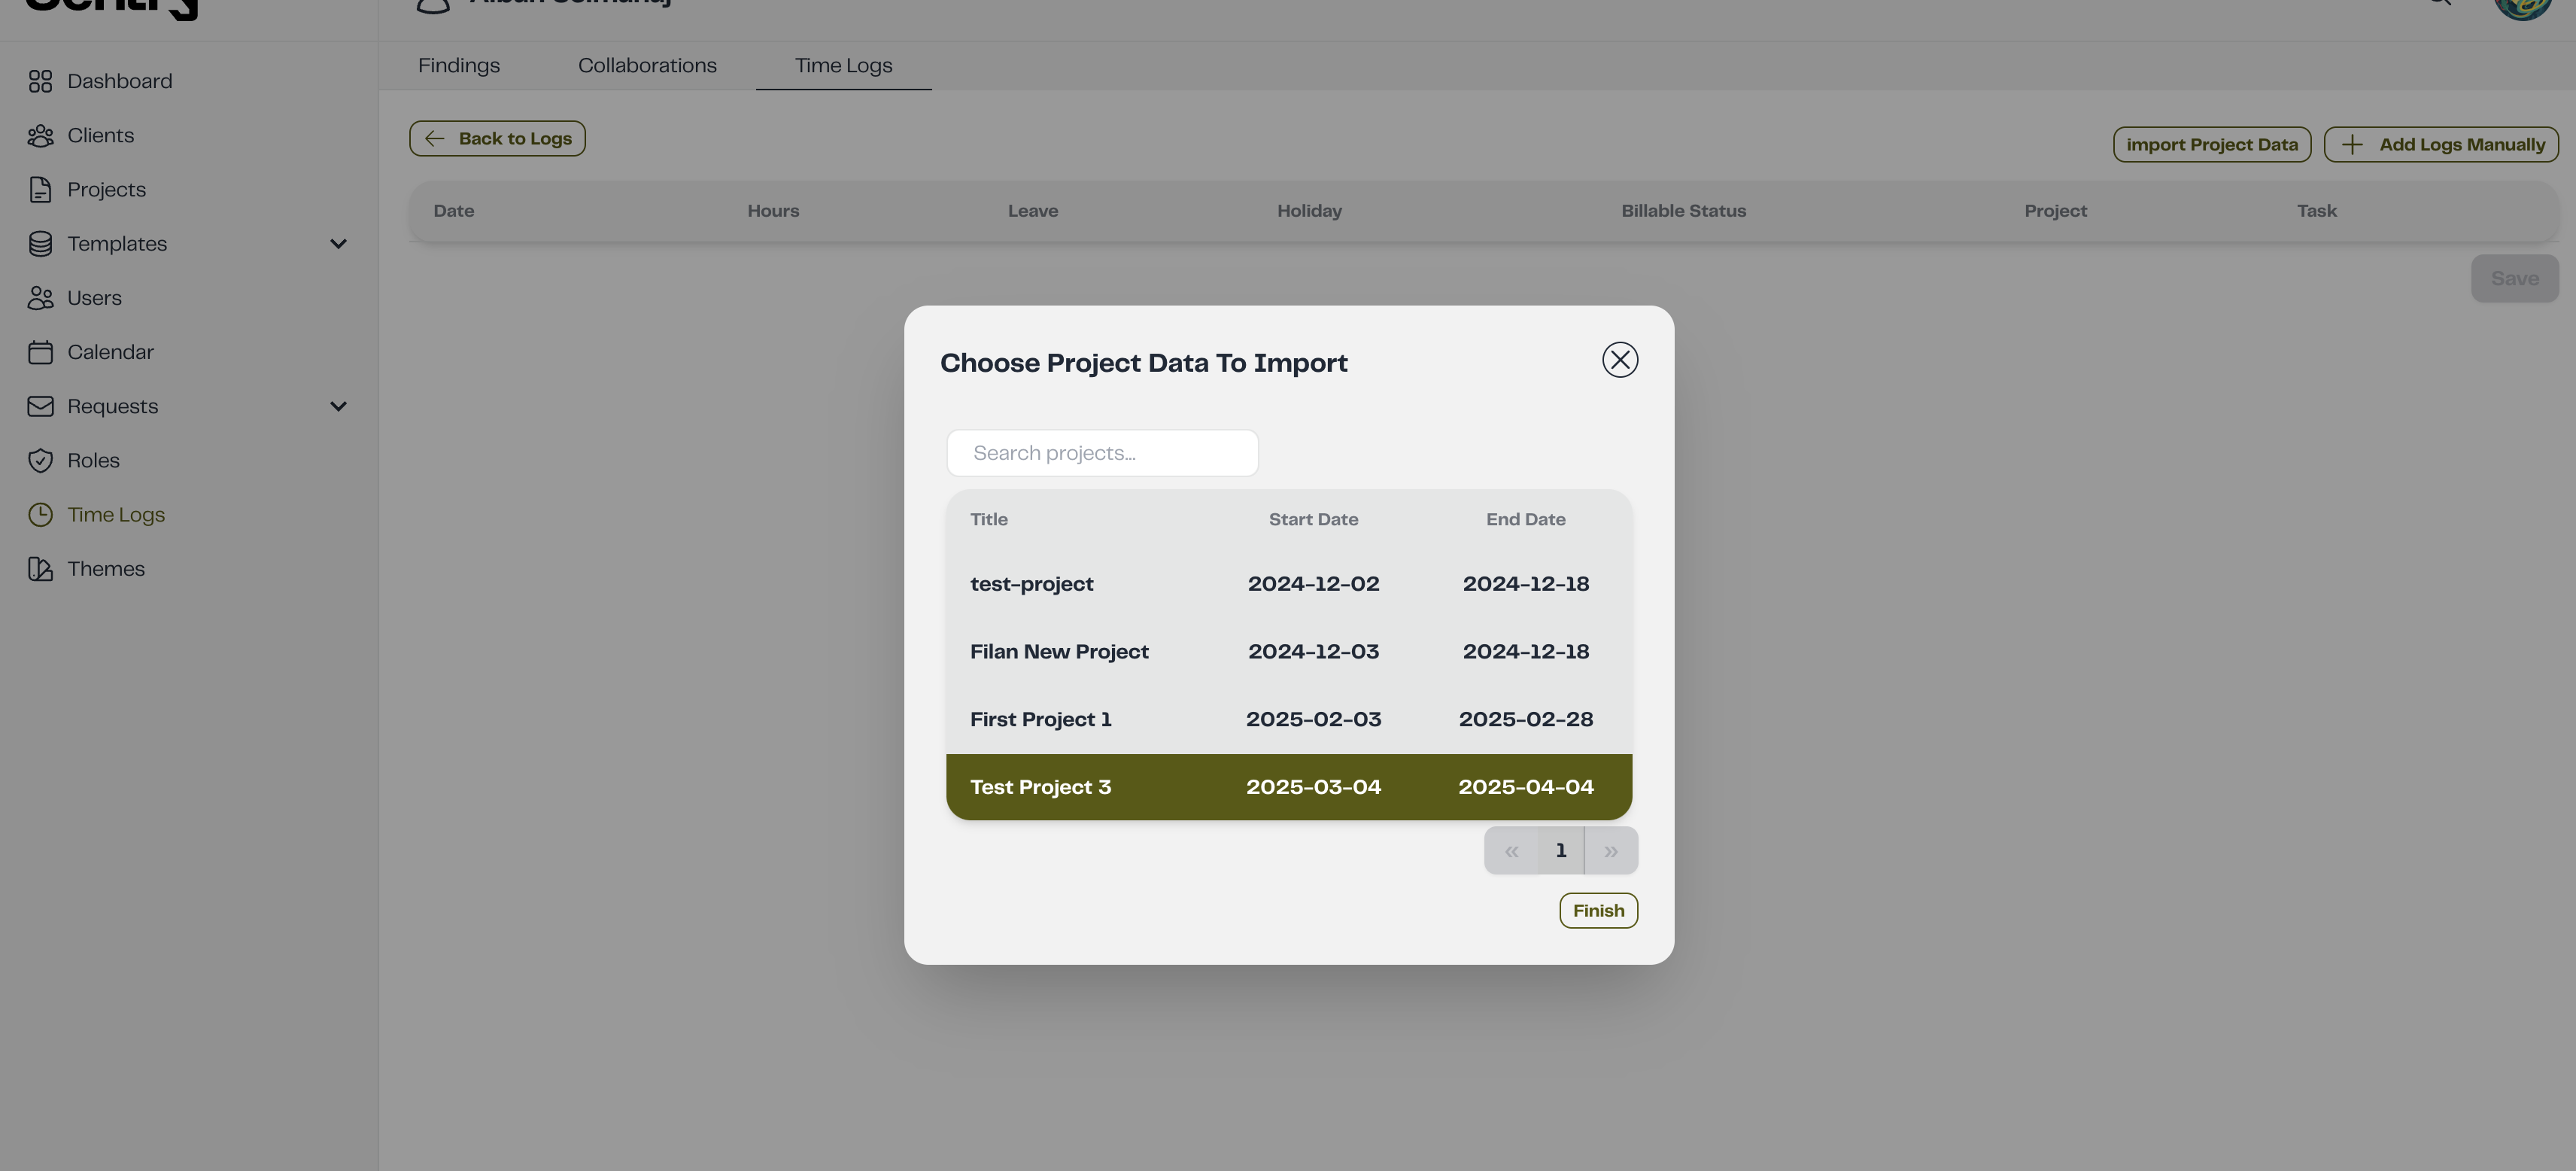
- Select the project from which you want to add hours.
- This will import all the working days from the selected project's start date to its end date.
- Click the Finish button.
- The table will then list all the days from the project's duration, allowing you to modify them as needed.
- Click Save to add the logs or the X button to cancel.
Modifying Time Logs
To modify an existing time log:
- Locate the time log entry in the table.
- Click the Pencil (Edit) button next to the entry.
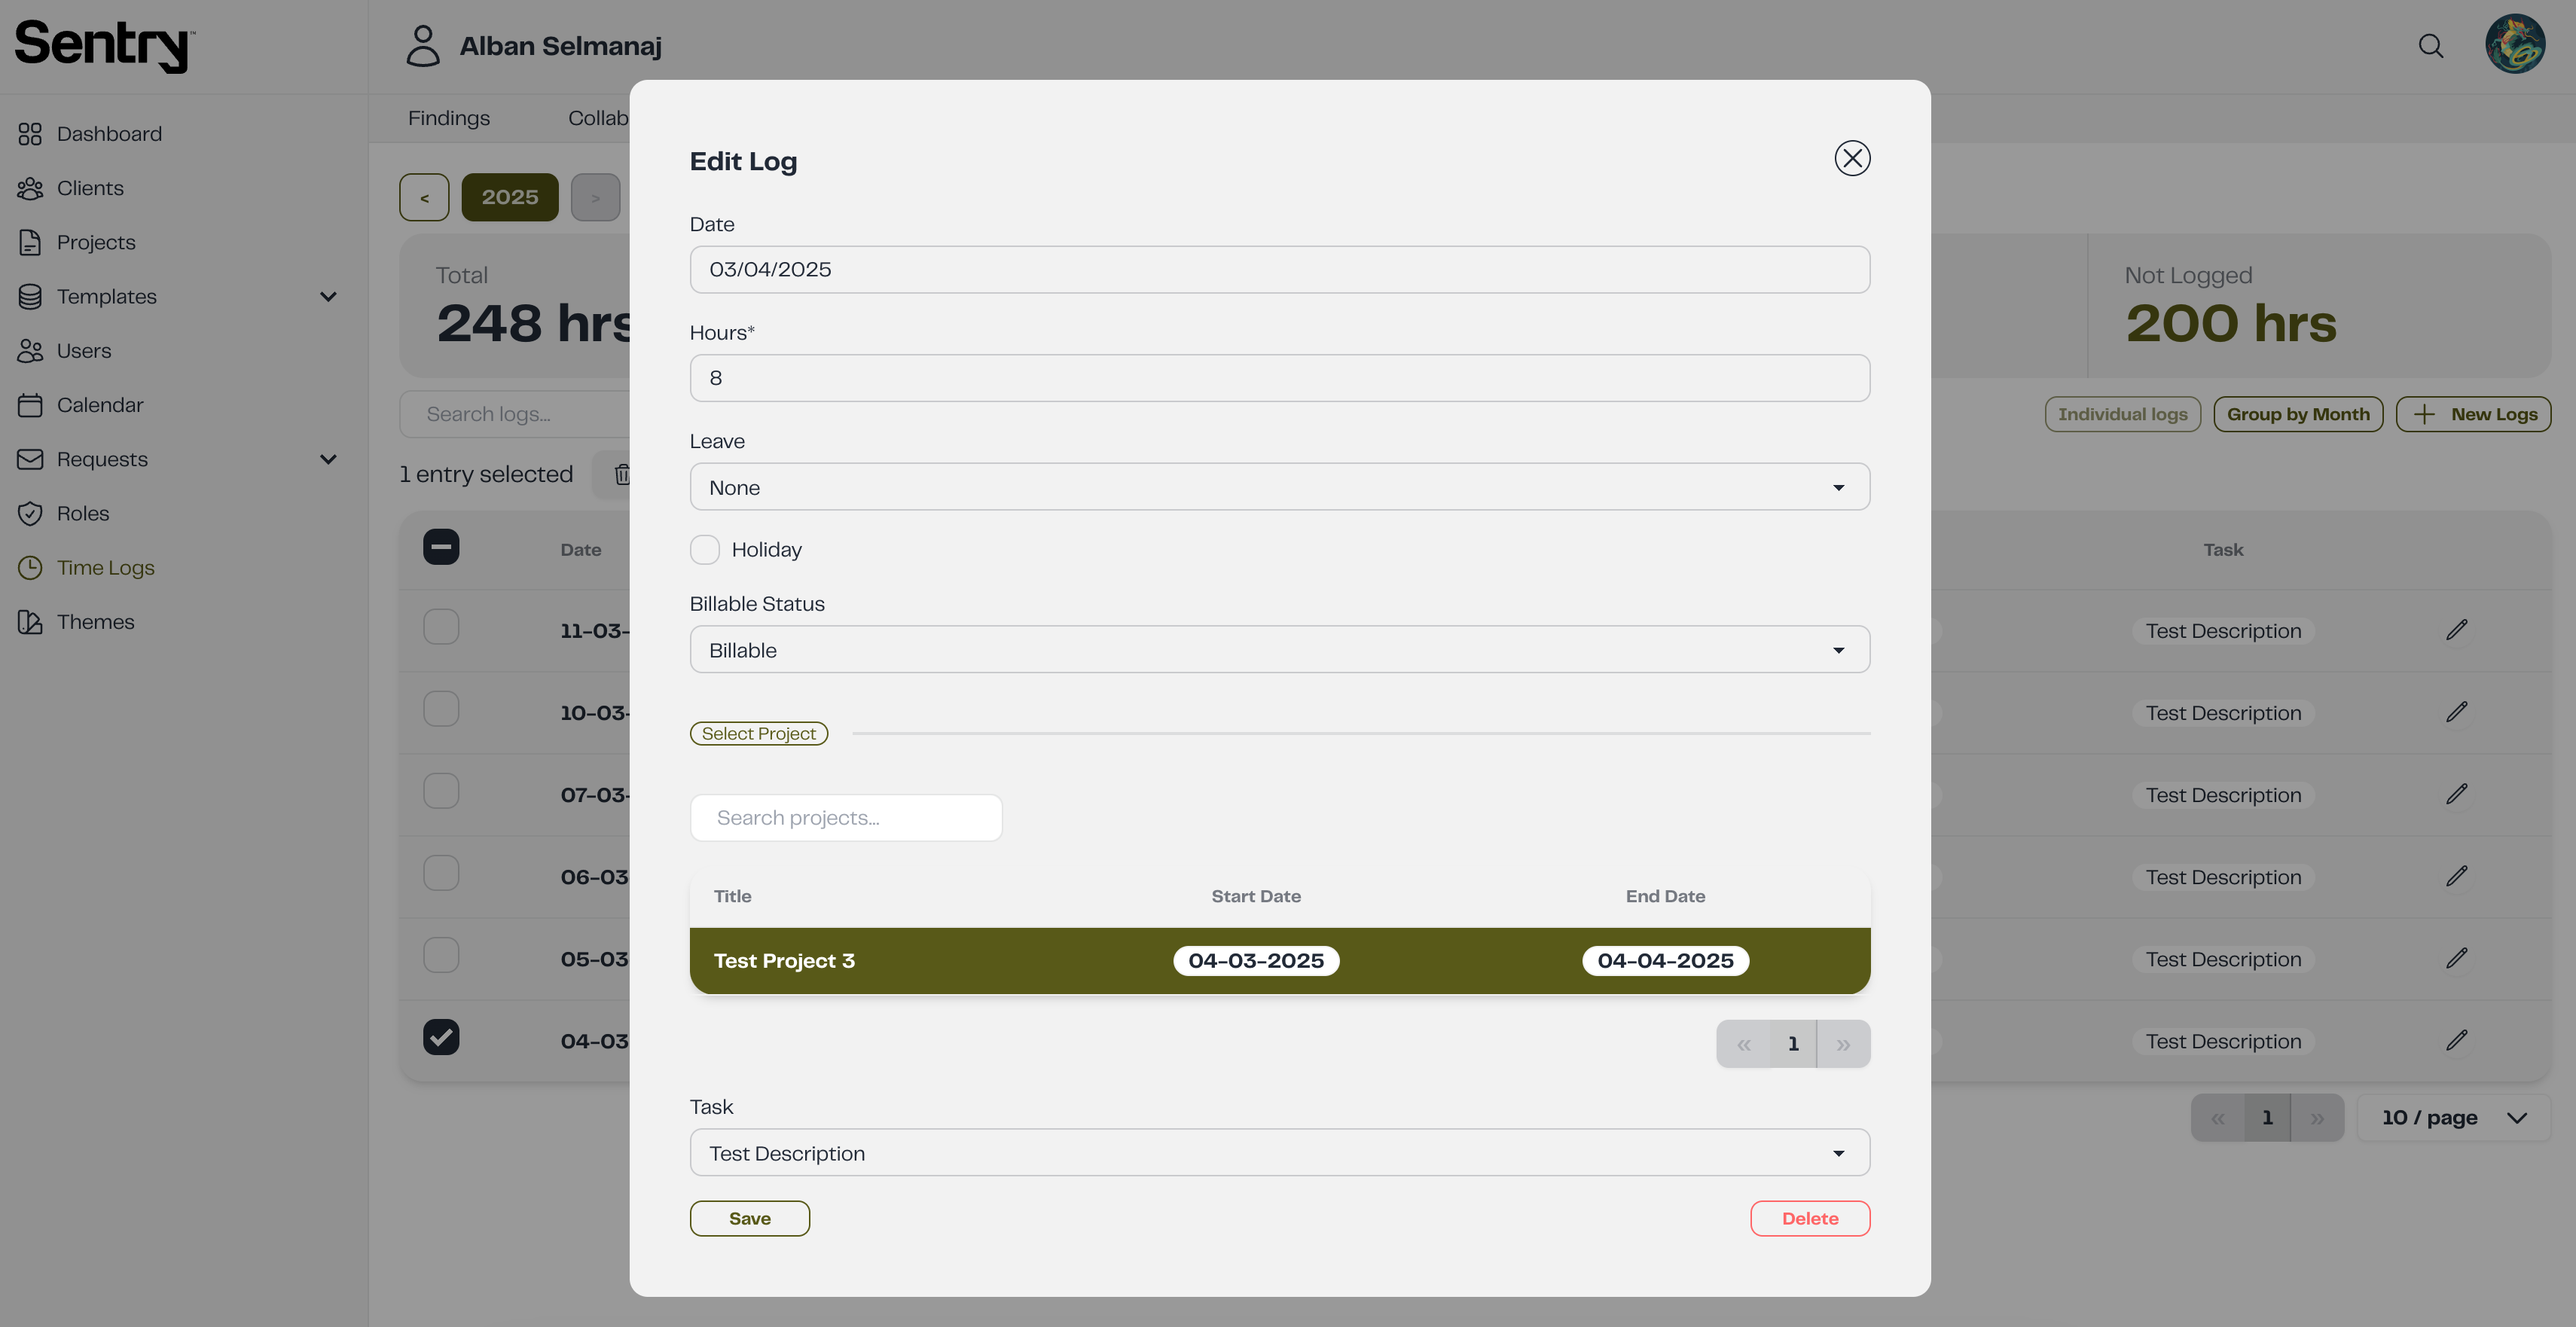
- Modify the necessary details, such as working hours, leave type, holiday status, billable status, project, or task.
- Click Save to apply the changes.
Deleting Time Logs
To delete a time log:
- Locate the time log entry in the table.
- Click the Delete button next to the entry.
- Confirm the deletion when prompted.
Bulk Deleting Multiple Logs
- Select multiple logs by checking the boxes next to each entry.
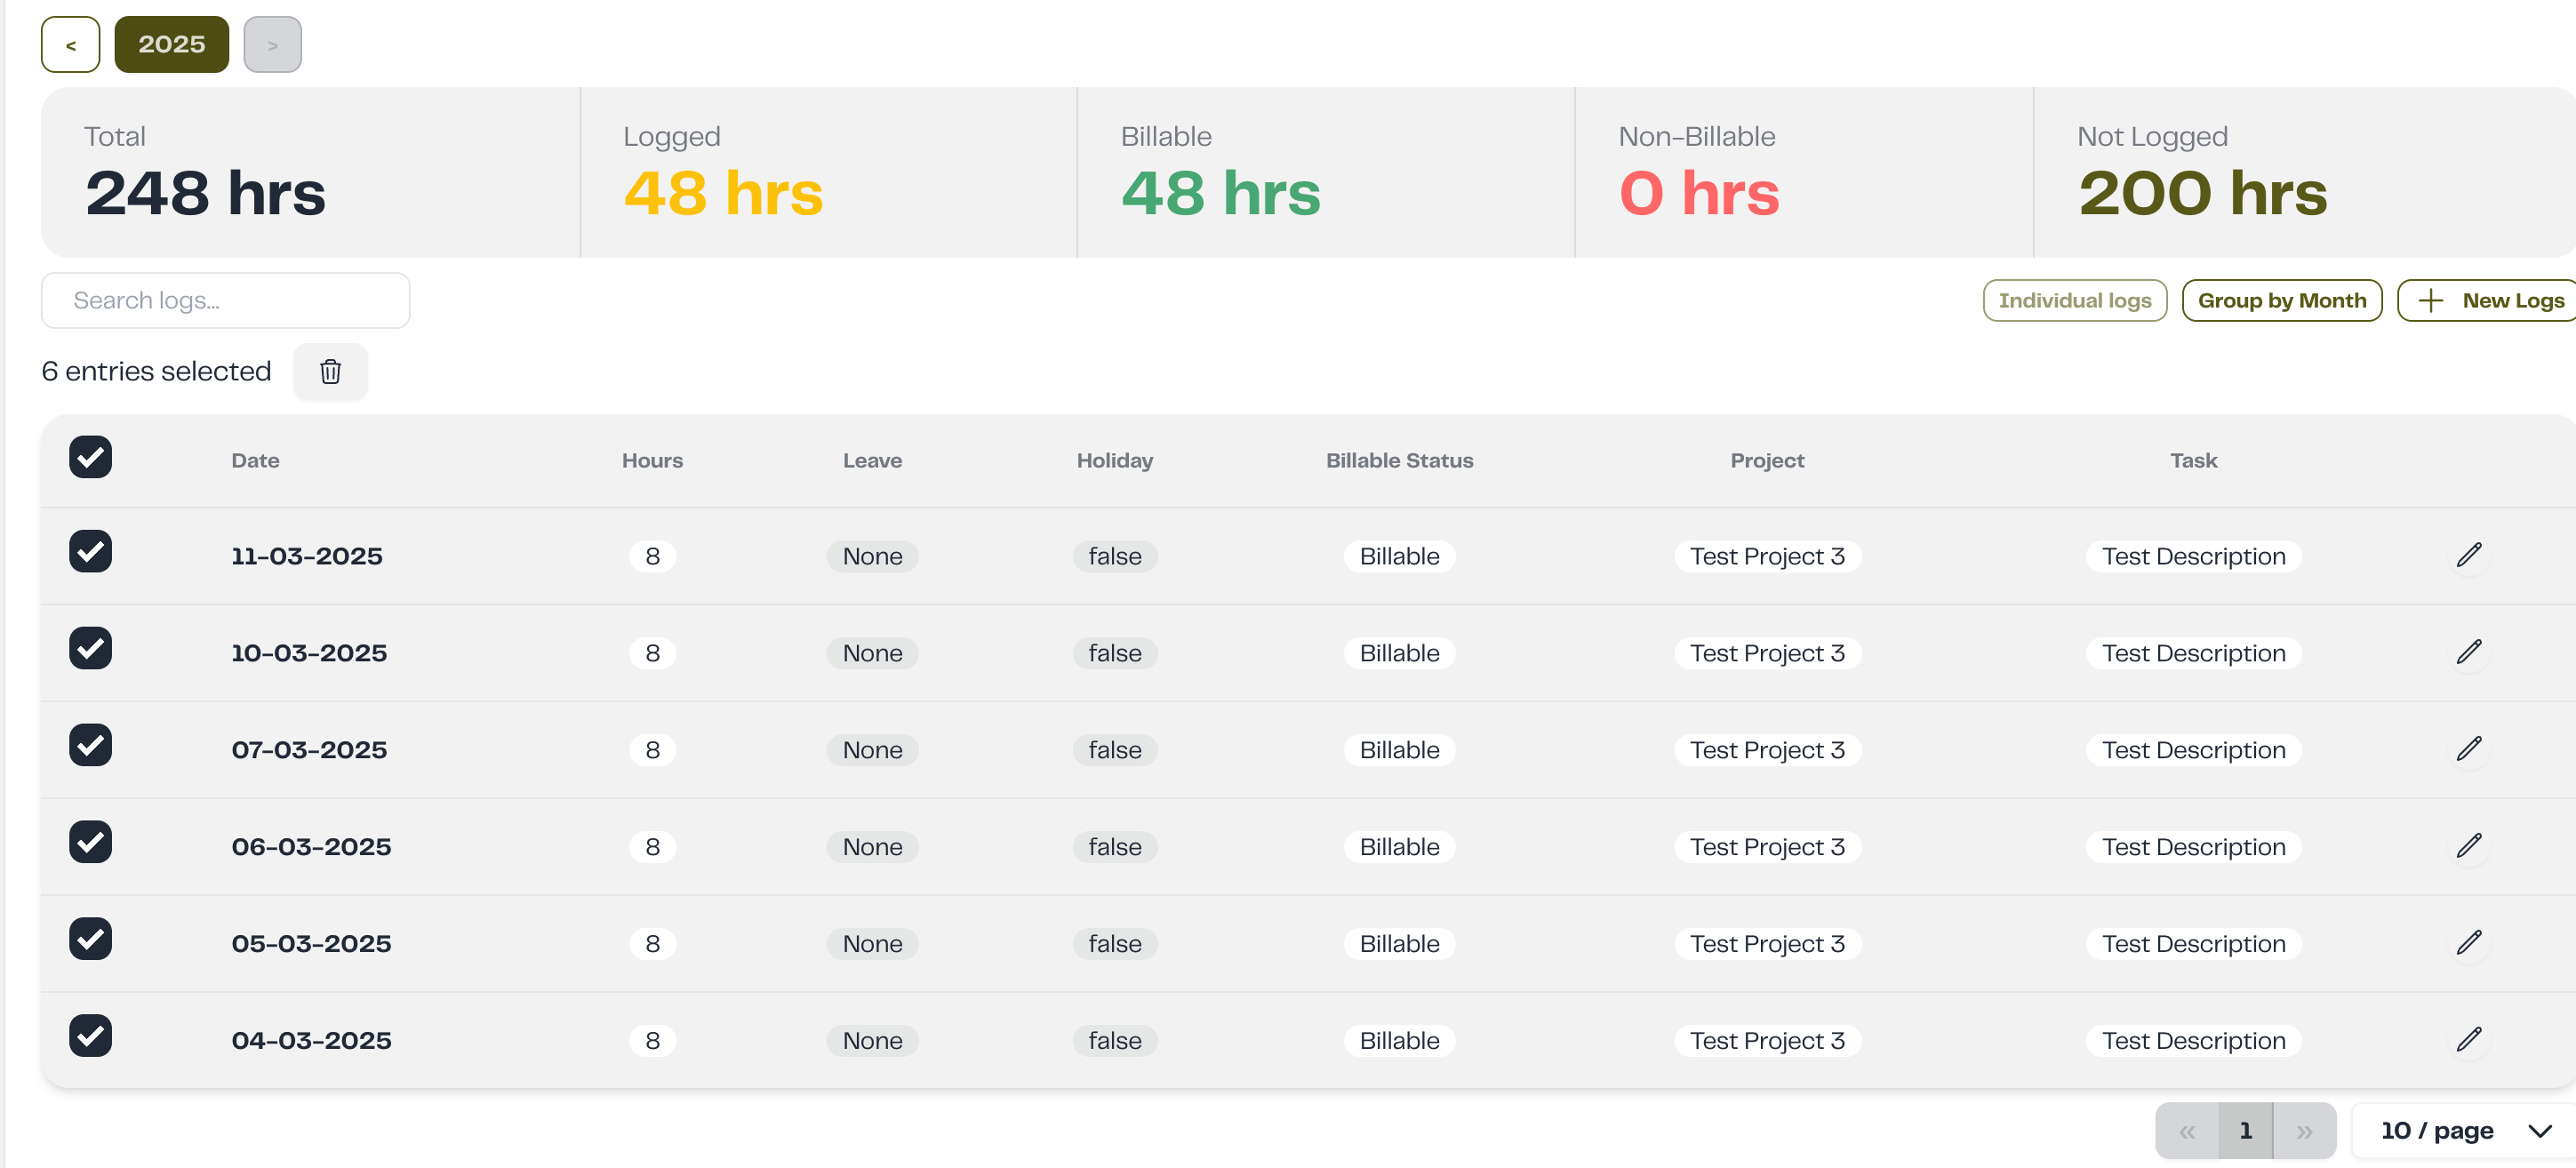
- Click the Trash (Delete) button.
- Confirm the deletion to remove all selected logs simultaneously.
This allows users to efficiently manage and update their time logs as needed.